{"schema":"libjg2-1",
"vpath":"/git/",
"avatar":"/git/avatar/",
"alang":"",
"gen_ut":1753414502,
"reponame":"lws-esp32-factory",
"desc":"ESP32 LWS factory image",
"owner": { "name": "Andy Green", "email": "andy@warmcat.com", "md5": "c50933ca2aa61e0fe2c43d46bb6b59cb" },"url":"https://libwebsockets.org/repo/lws-esp32-factory",
"f":3,
"items": [
{ "schema":"libjg2-1",
"oid":{ "oid": "79829488c941537cc029fc2e49b89bde377bca3f", "alias": []},"tree": [
{ "name": "components","mode": "16384", "size":0},
{ "name": "main","mode": "16384", "size":0},
{ "name": "romfs-files","mode": "16384", "size":0},
{ "name": ".gitignore","mode": "33188", "size":46},
{ "name": ".gitmodules","mode": "33188", "size":136},
{ "name": "LICENSE","mode": "33188", "size":28281},
{ "name": "Makefile","mode": "33188", "size":994},
{ "name": "README.md","mode": "33188", "size":4401},
{ "name": "partitions.csv","mode": "33188", "size":328},
{ "name": "sdkconfig","mode": "33188", "size":8316}],"s":{"c":1753414502,"u": 468}}
,{"schema":"libjg2-1",
"cid":"9c794d2c54d9ec2351f4d13a13427491",
"oid":{ "oid": "79829488c941537cc029fc2e49b89bde377bca3f", "alias": []},"blobname": "README.md", "blob": "lws-esp32-factory\n\u003d\u003d\u003d\u003d\u003d\u003d\u003d\u003d\u003d\u003d\u003d\u003d\u003d\u003d\u003d\u003d\u003d\n\nThis is a standalone \u003c1MB image intended for the 1MB \u0022factory\u0022 slot on ESP32.\n\nIt has the following capabilities:\n\n### Initial Factory Setup Page\n\nAllows overriding default serial, setting device options string, and uploading SSL certs\n\n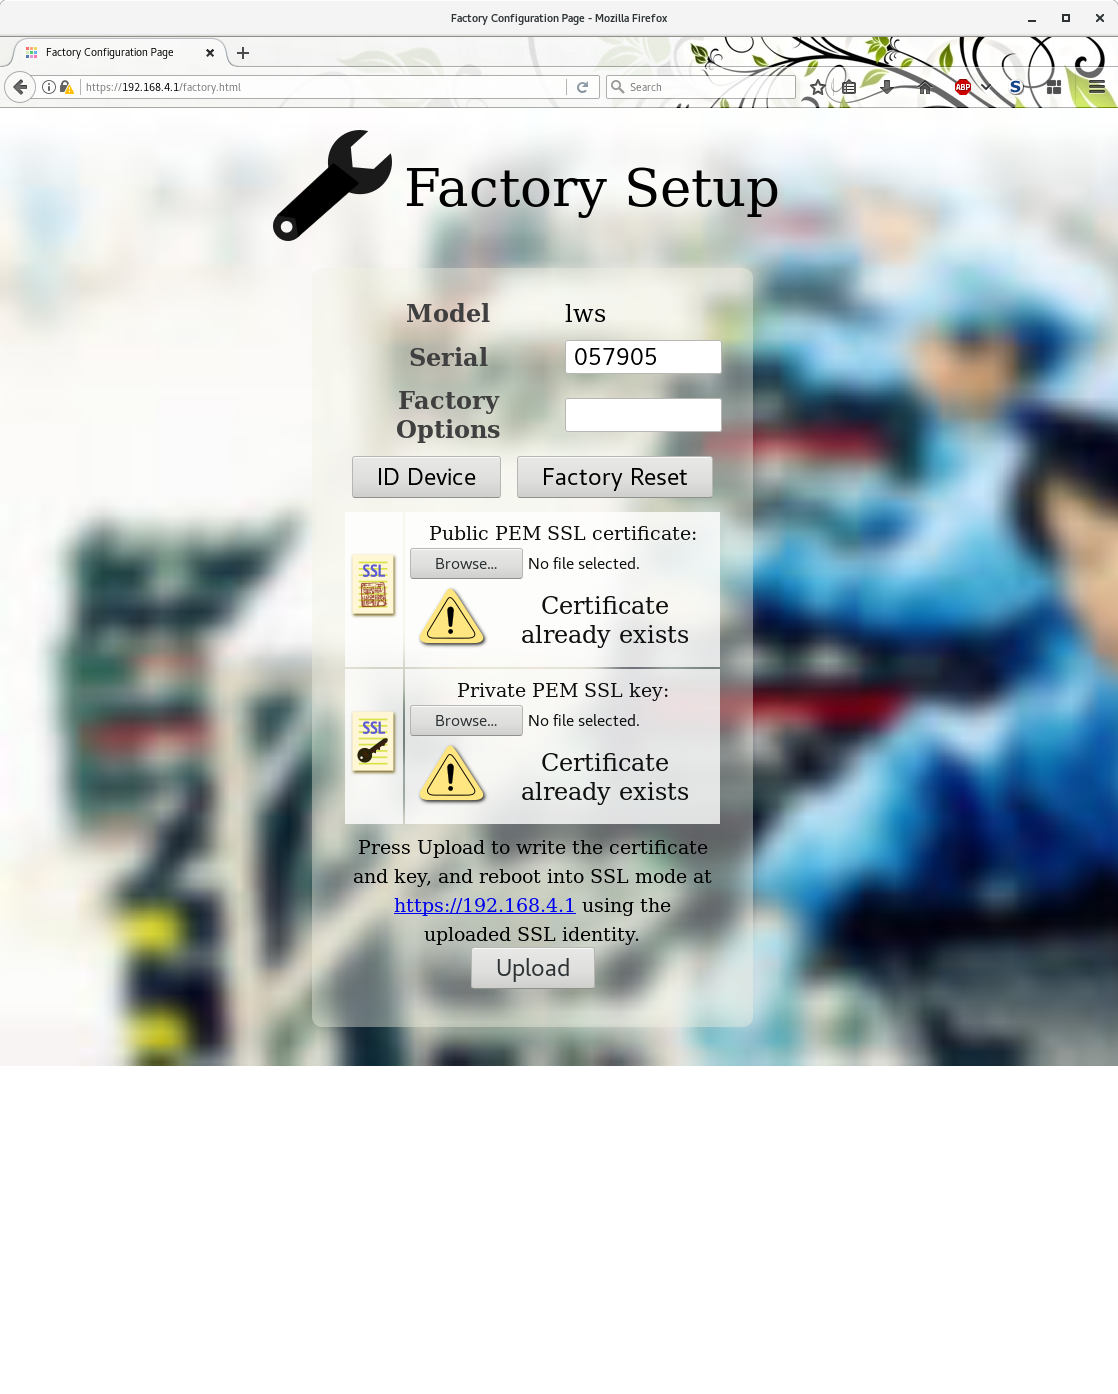\n\nWith an empty nvs, the first time this will come up at http://192.168.4.1 in AP mode, ie at port 80 without SSL since no certs.\n\nAfter the DER format SSL certs have been uploaded, everything subsequently is in https.\n\n### User configuration Setup Page\n\n\n\nIf no AP information is in the nvs, this page comes up automatically at https://192.168.4.1 in AP mode.\n\nThe user can reach it subsequently programmatically or by grounding a GPIO (ie, by a button), the default GPIO is IO14.\n\nThe page allows you to select an AP from a scan list and give a passphrase.\n\nOnce it connects, the DHCP information is shown, and it autonomously connects to a configurable server over https to check for updates. The user can select to have it autonomously download the update and restart.\n\nThe user can also upload images by hand. The factory image understands how to update both the 1MB factory slot itself and the single 2.9MB OTA slot using autonomous upload from a server or the browser based file upload.\n\n## Optional default peripherals\n\nIt's not required, but the default code expects\n\n - pushbutton to 0V connected on IO14\n\nIf the pushbutton is held down at boot, the user is forced into the factory / Setup mode rather than the OTA application.\n\n - LED connected via, eg, 330R 3.3V ---|\u003e|-----/\u005c\u005c/\u005c\u005c/\u005c\u005c---- IO23\n\nWhile in factory / OTA mode, the LED flashes on and off at 500ms. When you press \u0022ID Device\u0022 button in the UI, the LED flashes rapidly for 5s.\n\n\n## Building and using\n\n### Step 0: Install prerequisites\n\n### 0.1: genromfs\n\nFor Ubuntu / Debian and Fedora at least, the distro package is called \u0022genromfs\u0022\n\n### 0.2: recent CMake\n\nCMake v2.8 is too old... v3.7+ are known to work OK and probably other intermediate versions are OK.\n\n### Step 1: Clone and get lws submodule\n\n```\n $ git clone git@github.com:warmcat/lws-esp32-factory.git\n $ git submodule update --init --recursive\n```\n\n### Step 2: Erase the whole device\n\nClear down the partitioning since we write a custom table and the bootloader\nwill choke if the OTA parts are not initialized like this one time\n\n```\n $ make erase_flash\n```\n\n## Step 3: General build and flash\n\n```\n $ make all flash monitor\n```\n\n## Using the Factory Config\n\n - From scratch, the device is in AP mode with a AP name like config-lws-SERIAL\n\n - From scratch, the factory app listens at http://192.168.4.1/factory.html\n\n - build generates a selfsigned DER acert and key in top level directory of this project each time, `ssl-cert.der` and `ssl-key.der`. Use the form to upload these.\n\n - after the reboot vist https://192.168.4.1, which will take you to the user setup\n\n - As a security feature, since you can programmatically reboot into factory mode from the OTA application, once the SSL certs are set some features require the \u0022boot into factory\u0022 button to be physically pressed before they can be accessed subsequently. This limits what a remote attacker can achieve.\n\n## Using the User setup\n\n - connect your wifi to the ap \u0022lws-config-....\u0022\n\n - In a browser, go to https://192.168.4.1\n\n - Select your normal AP from the list\n\n - Give the AP password and click the button\n\n - Your ESP32 should associate with the AP without resetting\n\n## Using the lws test apps\n\nThis application is just the factory / setup application.\n\nThe end-user applications are separate projects, see eg\n\nhttps://github.com/warmcat/lws-esp32-test-server-demos\n\nThese are built and loaded slightly differently, ie\n\n```\n $ make all flash_ota monitor\n```\n\nThis is because they target the 2.9MB OTA flash area.\n\nThe `build/*.bin` file from the application build may also be uploaded in the setup page upload UI.\n\nNOTE: the first time you flash the OTA application, you need to do it using the\nupload file button or the autonomous update facility in the Factory App. The bootloader\nrequires it to not only be flashed, but marked as bootable.\n\nSubsequently you can just reflash the OTA partition with `make flash_ota` or use the upload or autonomous update stuff in the -factory app.\n\n","s":{"c":1753414502,"u": 135}}
],"g": 2419,"chitpc": 0,"ehitpc": 0,"indexed":0
,
"ab": 1, "si": 0, "db":0, "di":1, "sat":0, "lfc": "0000"}